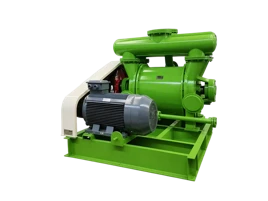
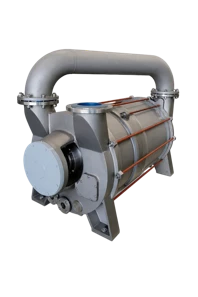
Hey there! As a supplier of liquid ring vacuum pumps, I often get asked about maintenance and replacement procedures. One common question is how to replace the casing of a liquid ring vacuum pump. In this blog post, I'll walk you through the process step by step.
First off, let me briefly introduce our product range. We offer a variety of liquid ring vacuum pumps, including the 2BE1 Liquid Ring Vacuum Pump, the 2BV Liquid Ring Vacuum Pump, and the 2BE3 Large Liquid Ring Vacuum Pump. Each of these pumps has its own unique features and applications, but the general process of replacing the casing is quite similar.
Why Replace the Casing?
Before we dive into the replacement process, let's talk about why you might need to replace the casing in the first place. Over time, the casing of a liquid ring vacuum pump can wear out due to factors like corrosion, abrasion, or mechanical stress. A damaged casing can lead to leaks, reduced performance, and even complete pump failure. So, replacing the casing is an important maintenance task that can extend the lifespan of your pump and keep it running smoothly.
Tools and Materials You'll Need
- Wrenches and Socket Set: You'll need a set of wrenches and sockets to remove the bolts holding the casing in place. Make sure you have the right sizes for your pump.
- Sealant: A good quality sealant is essential to prevent leaks between the casing and the pump body. Choose a sealant that is compatible with the materials used in your pump.
- Lifting Equipment: Depending on the size and weight of the casing, you may need some lifting equipment, such as a hoist or a forklift, to safely remove and install the new casing.
- Cleaning Supplies: You'll need to clean the pump body and the mating surfaces of the new casing before installation. Use a degreaser and a clean cloth to remove any dirt, oil, or debris.
Step-by-Step Replacement Process
Step 1: Preparation
- Shut Down the Pump: Before you start working on the pump, make sure it is completely shut down and disconnected from the power source. This will prevent any accidental startup and ensure your safety.
- Drain the Liquid: Open the drain valve and drain all the liquid from the pump. This will make it easier to remove the casing and prevent any spills.
- Remove the Accessories: Remove any accessories, such as the inlet and outlet pipes, the pressure gauges, and the control valves, from the pump. Keep these parts organized and labeled so you can easily reinstall them later.
Step 2: Remove the Old Casing
- Loosen the Bolts: Use the wrenches and sockets to loosen the bolts holding the casing to the pump body. Start by loosening the bolts evenly around the perimeter of the casing to prevent any binding.
- Lift the Casing: Once all the bolts are loose, use the lifting equipment to carefully lift the old casing off the pump body. Be careful not to damage the pump body or the mating surfaces.
- Inspect the Pump Body: While the casing is removed, take the time to inspect the pump body for any signs of damage or wear. Look for cracks, corrosion, or other issues that may need to be addressed.
Step 3: Prepare the New Casing
- Clean the Casing: Use the cleaning supplies to clean the new casing thoroughly. Pay special attention to the mating surfaces and make sure they are free of any dirt, oil, or debris.
- Apply Sealant: Apply a thin layer of sealant to the mating surfaces of the new casing. Make sure the sealant is evenly distributed and covers the entire surface.
- Install the Gaskets: If your pump uses gaskets, install them on the mating surfaces of the new casing. Make sure the gaskets are properly aligned and seated.
Step 4: Install the New Casing
- Lower the Casing: Use the lifting equipment to carefully lower the new casing onto the pump body. Make sure the casing is properly aligned with the pump body and the mating surfaces are in contact.
- Tighten the Bolts: Use the wrenches and sockets to tighten the bolts holding the casing to the pump body. Start by tightening the bolts evenly around the perimeter of the casing, gradually increasing the torque until the bolts are fully tightened.
- Reinstall the Accessories: Reinstall all the accessories, such as the inlet and outlet pipes, the pressure gauges, and the control valves, that you removed earlier. Make sure they are properly connected and tightened.
Step 5: Testing
- Fill the Pump with Liquid: Fill the pump with the appropriate liquid, such as water or oil, to the recommended level.
- Start the Pump: Connect the pump to the power source and start it up. Check for any leaks or abnormal noises. If everything looks and sounds okay, let the pump run for a few minutes to ensure it is operating properly.
- Monitor the Performance: Monitor the performance of the pump, such as the vacuum level, the flow rate, and the power consumption. Compare the performance to the specifications of the pump to make sure it is operating within the normal range.
Tips and Tricks
- Follow the Manufacturer's Instructions: Always follow the manufacturer's instructions when replacing the casing of a liquid ring vacuum pump. The instructions may vary depending on the model and make of the pump, so it's important to read them carefully.
- Use the Right Tools and Materials: Make sure you use the right tools and materials for the job. Using the wrong tools or materials can damage the pump and void the warranty.
- Take Your Time: Replacing the casing of a liquid ring vacuum pump is a complex and time-consuming process. Take your time and do it right to ensure the best results.
- Seek Professional Help if Needed: If you're not comfortable replacing the casing of a liquid ring vacuum pump yourself, or if you encounter any problems during the process, don't hesitate to seek professional help. A qualified technician can help you with the replacement and ensure that the pump is installed correctly.
Conclusion
Replacing the casing of a liquid ring vacuum pump is an important maintenance task that can extend the lifespan of your pump and keep it running smoothly. By following the steps outlined in this blog post and using the right tools and materials, you can replace the casing of your pump safely and effectively. If you have any questions or need further assistance, please don't hesitate to contact us. We're here to help you with all your liquid ring vacuum pump needs.
If you're in the market for a new liquid ring vacuum pump or need to replace the casing of your existing pump, we'd love to hear from you. Contact us today to discuss your requirements and get a quote. We offer high-quality products, competitive prices, and excellent customer service. Let's work together to find the best solution for your business.


References
- Manufacturer's manuals for liquid ring vacuum pumps
- Industry best practices for pump maintenance and repair