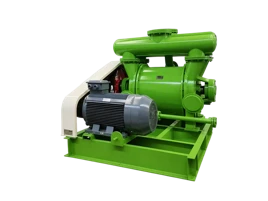
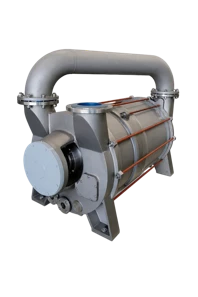
Hey there! As a supplier of dry pumps, I know how crucial it is to keep these machines in top - notch condition. A well - maintained dry pump not only performs better but also has a longer lifespan. In this blog, I'm gonna walk you through the steps on how to clean a dry pump.
First off, let's understand why cleaning is so important. Dry pumps are used in a wide range of industries, from semiconductor manufacturing to food processing. Over time, they can accumulate dust, debris, and even chemical residues. If not cleaned regularly, these build - ups can cause the pump to work less efficiently, increase energy consumption, and may even lead to breakdowns.
Pre - cleaning Preparations
Before you start cleaning, you need to take some safety precautions. First, make sure the pump is turned off and unplugged. This might seem obvious, but you'd be surprised how many accidents happen because people forget this simple step. Also, wear appropriate personal protective equipment (PPE), like gloves and safety glasses. The debris inside the pump can be sharp or harmful to your skin and eyes.
Next, gather the necessary cleaning tools. You'll typically need a soft brush, like a paintbrush, to remove loose dust and debris. A can of compressed air is also super useful for blowing out hard - to - reach areas. For more stubborn residues, you might need some cleaning solvents. But be careful when choosing solvents. Make sure they are compatible with the materials used in your dry pump. Check the pump's manual for recommendations on suitable solvents.
Cleaning the External Parts
Let's start with the outside of the pump. Use a dry cloth to wipe down the surface of the pump. This will remove any dust or dirt that has settled on it. Pay special attention to the vents and cooling fins. These areas can easily get clogged, which can affect the pump's cooling efficiency. Use the soft brush to gently clean the vents and fins. If there are any stubborn stains, you can dampen the cloth slightly with a mild cleaning solution.
Once you've wiped down the surface, use the can of compressed air to blow out any remaining dust from the vents and other small openings. Hold the can upright and spray short bursts of air into the openings. This will help dislodge any debris that is stuck inside.
Cleaning the Internal Components
Now, it's time to move on to the inside of the pump. This is a more delicate process, so take your time. First, remove the access panels. These are usually held in place by screws. Keep the screws in a safe place so you don't lose them.


Once the access panels are off, you'll be able to see the internal components, like the rotors, chambers, and valves. Use the soft brush to gently brush away any loose dust and debris from these parts. Be careful not to damage the components while you're brushing.
For more stubborn residues, you can use the cleaning solvent. Apply a small amount of the solvent to a clean cloth and gently wipe the affected areas. If the residue is really tough, you can soak some parts in the solvent for a short period. But again, make sure to check the pump's manual to ensure that soaking is safe for the specific parts.
After cleaning the components with the solvent, rinse them thoroughly with clean water if the manual allows it. Then, dry them completely using a clean, dry cloth or compressed air. Make sure there is no moisture left, as it can cause corrosion.
Reassembling the Pump
Once all the components are clean and dry, it's time to put the pump back together. Start by carefully placing the internal components back in their original positions. Make sure everything is properly aligned. Then, reattach the access panels and tighten the screws.
After reassembling, give the pump a quick visual inspection to make sure everything looks right. Check that all the parts are securely fastened and there are no loose items inside the pump.
Testing the Pump
Before you start using the pump again, it's important to test it. Plug the pump in and turn it on. Listen for any unusual noises or vibrations. If the pump seems to be working normally, let it run for a few minutes to make sure everything is functioning properly.
If you notice any problems during the test, like strange noises or reduced performance, stop the pump immediately. Check the components again to make sure they were assembled correctly. If you're still having issues, it might be a good idea to contact a professional technician.
Our Dry Pump Offerings
At our company, we offer a variety of high - quality dry pumps, such as the NZJP Multistage Roots Vacuum Pump, NZJQ Multistage Gas circulation - cooled Roots Pump, and ZJP Roots Vacuum Pump. These pumps are designed for optimal performance and durability. But like any machine, they need regular cleaning and maintenance to keep them running smoothly.
If you're in the market for a new dry pump or need help with maintenance, don't hesitate to reach out. We're here to assist you with all your dry pump needs. Whether you're a small business or a large industrial operation, we have the right pump for you. Contact us today to start a conversation about your requirements.
References
- Manufacturer's manuals for dry pumps
- Industry best practices for pump maintenance
So, there you have it! A step - by - step guide on how to clean a dry pump. By following these steps, you can keep your dry pump in great shape and ensure it performs at its best for years to come.