Hey there! I'm a supplier of chemical vacuum pumps, and today I'm gonna walk you through the process of replacing the valve of a chemical vacuum pump. It might seem a bit daunting at first, but with the right steps and a bit of know - how, you'll be able to get it done smoothly.


Why Replace the Valve?
First off, you might be wondering why you'd need to replace the valve in the first place. Well, valves in chemical vacuum pumps can wear out over time due to constant use, exposure to chemicals, and high - pressure conditions. A faulty valve can lead to reduced pump performance, leaks, and even damage to the entire pump system. So, timely valve replacement is crucial to keep your pump running efficiently.
Tools You'll Need
Before you start the replacement process, gather the necessary tools. You'll need a set of wrenches (both open - end and socket wrenches), a screwdriver (both flat - head and Phillips - head), a sealant (if required), a clean cloth, and safety gear like gloves and goggles. Safety first, folks!
Step 1: Preparation
- Shut Down the Pump: The very first thing you need to do is turn off the chemical vacuum pump. Make sure it's completely powered down and has cooled off if it was running recently. This will prevent any accidental start - up during the replacement process and protect you from getting burned.
- Isolate the Pump: Disconnect the pump from the power source and any other connected systems. This includes shutting off the chemical supply lines and disconnecting the electrical connections. You don't want any unexpected chemical flow or electrical shocks while you're working on the valve.
- Relieve Pressure: If there's any pressure built up in the pump, carefully relieve it following the manufacturer's instructions. This can usually be done by opening a pressure - relief valve or using a specific venting mechanism.
Step 2: Locate the Valve
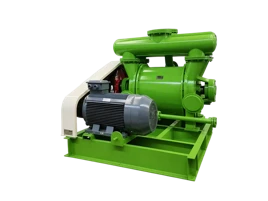
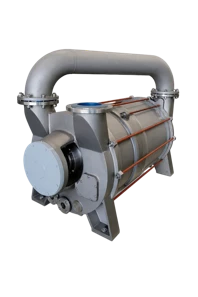
Now, it's time to find the valve that needs to be replaced. Different models of chemical vacuum pumps have different valve locations. For example, in the 2BE1 Liquid Ring Vacuum Pump, the valve might be located near the intake or exhaust port. In the 2BV Liquid Ring Vacuum Pump, it could be in a different position. Refer to your pump's manual to accurately locate the valve.
Step 3: Remove the Old Valve
- Loosen the Fasteners: Use your wrenches or screwdrivers to loosen the fasteners that are holding the valve in place. These could be bolts, nuts, or screws. Be careful not to strip the threads while doing this.
- Disconnect the Lines: Once the fasteners are loose, gently disconnect any hoses, pipes, or electrical connections attached to the valve. Some valves might have gaskets or seals that need to be removed carefully. Use your clean cloth to wipe away any debris or chemical residue around the valve area.
- Take Out the Valve: After all the connections are disconnected, carefully remove the old valve from the pump. Be aware that there might still be some residual chemicals or fluid in the valve, so handle it with care.
Step 4: Inspect the New Valve
Before installing the new valve, take a good look at it. Check for any visible damage, such as cracks, dents, or missing parts. Make sure it's the correct valve for your pump model. If you're unsure, double - check with the manufacturer or your supplier.
Step 5: Install the New Valve
- Apply Sealant (if needed): If the valve requires a sealant, apply a thin, even layer of it to the mating surfaces. This will help prevent leaks once the valve is installed.
- Position the Valve: Carefully place the new valve in the same position where the old one was removed. Make sure it's properly aligned with the ports and connections.
- Reconnect the Lines: Reattach all the hoses, pipes, and electrical connections to the new valve. Tighten the connections securely, but don't over - tighten them as it could damage the valve or the connections.
- Tighten the Fasteners: Use your wrenches or screwdrivers to tighten the fasteners that hold the valve in place. Make sure they're tightened evenly to ensure a proper seal.
Step 6: Testing
- Reconnect the Pump: Once the new valve is installed, reconnect the pump to the power source and the chemical supply lines.
- Power On the Pump: Slowly power on the pump and monitor its operation. Check for any leaks around the valve area. Listen for any unusual noises, which could indicate a problem with the valve installation.
- Check Performance: Measure the pump's performance parameters, such as vacuum level and flow rate. Compare these values with the pump's specifications to ensure that the new valve is working properly.
Step 7: Maintenance Tips
After replacing the valve, it's important to keep up with regular maintenance. This includes checking the valve for wear and tear periodically, cleaning the pump and its components, and following the manufacturer's recommended maintenance schedule.
Conclusion
Replacing the valve of a chemical vacuum pump might seem like a complex task, but if you follow these steps, you'll be able to do it successfully. Remember, safety is key throughout the process. If you ever feel unsure or encounter any problems, don't hesitate to reach out to a professional or your pump supplier.
If you're in the market for a new chemical vacuum pump or need replacement parts like valves, we're here to help. We offer a wide range of high - quality pumps, including the 2BE1 Liquid Ring Vacuum Pump, 2BV Liquid Ring Vacuum Pump, and 2BED 2 Stage Liquid Ring Vacuum Pump. Contact us for more information and to start a purchase negotiation. We're committed to providing you with the best products and services to meet your needs.
References
- Chemical Vacuum Pump Manufacturer's Manuals
- Industry - standard Chemical Pump Maintenance Guides