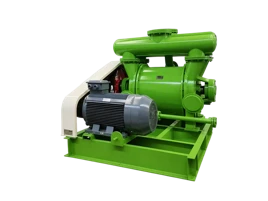
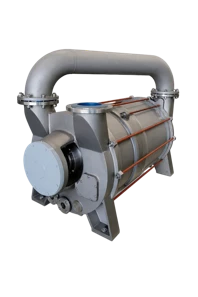
As a trusted supplier of ATEX screw vacuum pumps, I understand the importance of maintaining these critical pieces of equipment. Over time, parts of an ATEX screw vacuum pump may wear out or become damaged, and knowing how to replace them is essential for ensuring the pump's optimal performance and longevity. In this blog post, I'll guide you through the process of replacing parts of an ATEX screw vacuum pump, providing step - by - step instructions and valuable tips.


Understanding the ATEX Screw Vacuum Pump
Before diving into the replacement process, it's crucial to have a basic understanding of the ATEX screw vacuum pump. These pumps are designed for use in potentially explosive atmospheres, meeting strict safety standards. They work by using two intermeshing screws to compress gas and create a vacuum. Key components of the pump include the screws, bearings, seals, and the motor. Each part plays a vital role in the pump's operation, and any malfunction can lead to reduced performance or even pump failure.
Preparation for Replacement
Gather the Necessary Tools
The first step in replacing parts of an ATEX screw vacuum pump is to gather the appropriate tools. You'll typically need a set of wrenches, screwdrivers, pliers, and possibly a torque wrench. Make sure all tools are in good condition and of the correct size for the job.
Safety First
Since ATEX screw vacuum pumps are used in hazardous environments, safety is of utmost importance. Before starting any work on the pump, ensure that it is completely shut down and isolated from the power source. Wear appropriate personal protective equipment (PPE), such as safety glasses, gloves, and a protective suit.
Identify the Faulty Part
Accurately identifying the faulty part is crucial. This may involve conducting a thorough inspection of the pump, checking for signs of wear, damage, or leakage. You can also refer to the pump's maintenance manual or consult with our technical support team if you're unsure.
Step - by - Step Replacement Process
Removing the Access Panel
The first physical step in accessing the internal parts of the pump is to remove the access panel. Use the appropriate screwdriver to loosen and remove the screws holding the panel in place. Carefully set the panel aside in a safe location to avoid damage.
Locating the Faulty Part
Once the access panel is removed, you can locate the faulty part. For example, if it's a bearing, it will usually be found near the shaft of the screw. Take note of the part's position and how it is connected to other components.
Disconnecting the Faulty Part
Before removing the faulty part, you may need to disconnect any electrical connections, hoses, or other attachments. Use the appropriate tools to carefully disconnect these components. For example, if there are electrical wires, use wire strippers to remove the insulation and disconnect the wires.
Removing the Faulty Part
After disconnecting all attachments, use the appropriate tools to remove the faulty part. For example, if it's a screw, use a wrench to loosen and remove it. Be careful not to damage any surrounding components during the removal process.
Installing the New Part
Once the faulty part is removed, it's time to install the new part. Make sure the new part is the correct model and specification for your ATEX screw vacuum pump. Carefully position the new part in place and reconnect any electrical connections, hoses, or other attachments. Use the torque wrench to tighten any screws or bolts to the specified torque value to ensure a proper fit.
Reassembling the Pump
After installing the new part, reassemble the pump by replacing the access panel. Use the screwdriver to tighten the screws holding the panel in place. Make sure the panel is properly aligned and sealed to prevent any leaks.
Testing the Pump
Once the replacement is complete, it's essential to test the pump to ensure it is working correctly. Reconnect the power source and start the pump. Monitor the pump's performance, checking for any abnormal noises, vibrations, or leaks. If everything appears to be in order, the replacement was successful.
Tips for a Successful Replacement
- Keep Records: Maintain detailed records of all part replacements, including the date, part number, and any issues encountered. This will help with future maintenance and troubleshooting.
- Use Genuine Parts: Always use genuine parts from a reputable supplier. Using non - genuine parts may void the pump's warranty and can lead to performance issues.
- Regular Maintenance: To minimize the need for part replacements, perform regular maintenance on your ATEX screw vacuum pump. This includes cleaning, lubrication, and inspection.
Other Related Products
In addition to ATEX screw vacuum pumps, we also offer a range of other high - quality vacuum pumps, such as the VDP Dry Screw Vacuum Pump, ZJQ Gas circulation - cooled Roots Pump, and NZJP Multistage Roots Vacuum Pump. These pumps are designed to meet the diverse needs of different industries and applications.
Conclusion
Replacing parts of an ATEX screw vacuum pump may seem like a daunting task, but with the right knowledge, tools, and safety precautions, it can be done successfully. By following the steps outlined in this blog post and adhering to the tips provided, you can ensure the continued performance and reliability of your pump.
If you have any questions about replacing parts of your ATEX screw vacuum pump or are interested in purchasing a new pump or replacement parts, please feel free to contact us. Our team of experts is ready to assist you with all your vacuum pump needs.
References
- Manufacturer's Manual for ATEX Screw Vacuum Pump
- Industry Standards for Vacuum Pump Maintenance and Repair